One goal of automated testing through Squish is to find bugs and regressions in your application. The cause for some test failures is easy to spot, other ones can be hard to debug. Squish already provides crash dumps when the AUT decides to give up, but in not-so-obvious cases you might want to take a look with a debugger. One way to do that is to attach the debugger to the running application process. When debugging an issue it can however be more convenient to run your application in debug mode right from your IDE. This way you can experiment with it using Squish while observing behavior from the inside.
As you might know, Squish is able to attach to applications that are already running instead of starting them as part of the test script. The feature is useful to test AUTs running on embedded devices for example, but we can use it here just as well. The idea is to register an "attachable AUT" with Squish and to add a run configuration to your IDE that starts the AUT in "attachable mode". Let's first set it up in Squish and then look at specific IDE's to see how it's done.
Registering The Attachable AUT With Squish
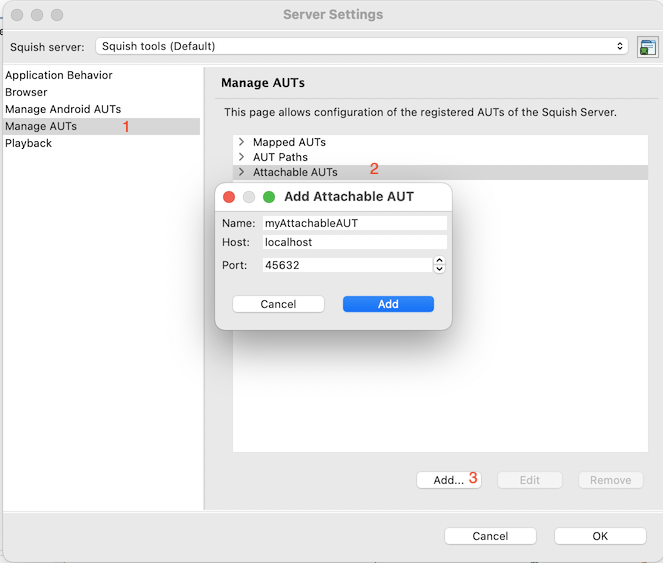
From the Squish IDE, select "Edit→Server Settings→Manage AUTs...", click "Attachable AUTs" and then choose "Add...". In the dialog that opens enter a name and an arbitrary (but free) port on the machine where the AUT will be running. The name will be what goes into the attachToApplication script call later.
Now Squish knows about the application, so let's configure the IDE to launch it accordingly.
Qt Creator 10
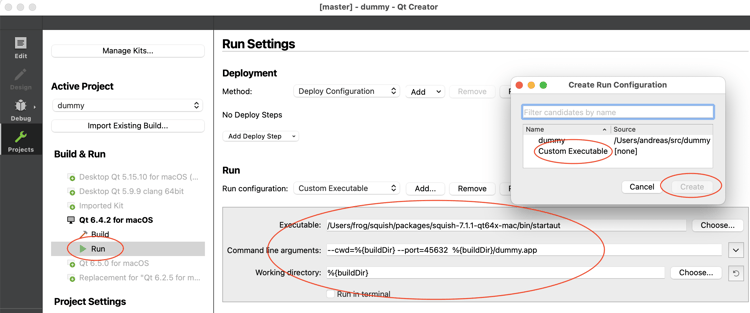
Qt Creator supports the Custom Executable run configuration type that allows us to run a, well, custom executable when launching the application. Open the Projects view and select the Run subcategory of the Qt version you wish to use. Then, select "Add" and in the dialog that is opened select "Custom Executable" and click "Create".
Now you need to configure the executable and arguments for it.
- Executable: Choose the "startaut" (Qt applications) or "startwinaut" (non-Qt Windows applications) executable from $SQUISH_PREFIX/bin. This little helper hooks your application and opens a port for the remote control connection to Squish.
- Command Line Arguments: These are the arguments that need to be passed to startaut. Set it to "--port=45632 %{CurrentRun:Executable:FilePath}" -- where the port is the one you chose when registering the AUT!
Caution: In Qt Creator there's a bug with the FilePath variable. Use the full path to the compiled AUT binary instead.
Visual Studio 2019
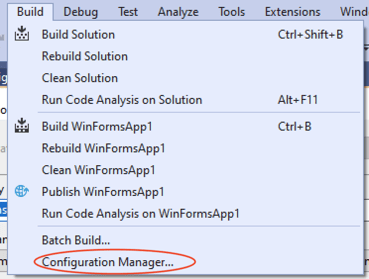
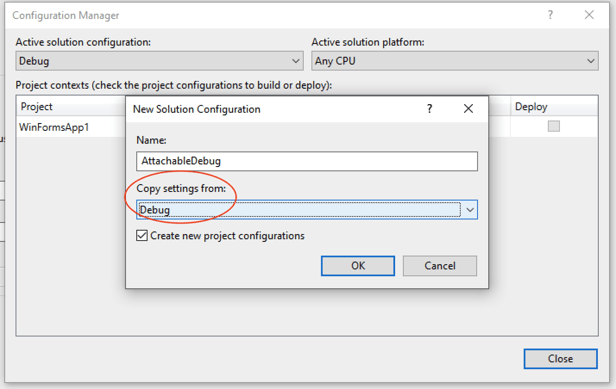
The setup in Visual Studio is quite similar to the one in Qt Creator. To keep things nicely separated you might want to first create a new Configuration in the Configuration Manager opened via the Debug/Release-Dropdown.
Make sure to copy the settings from the configuration you usually use to have everything in place:
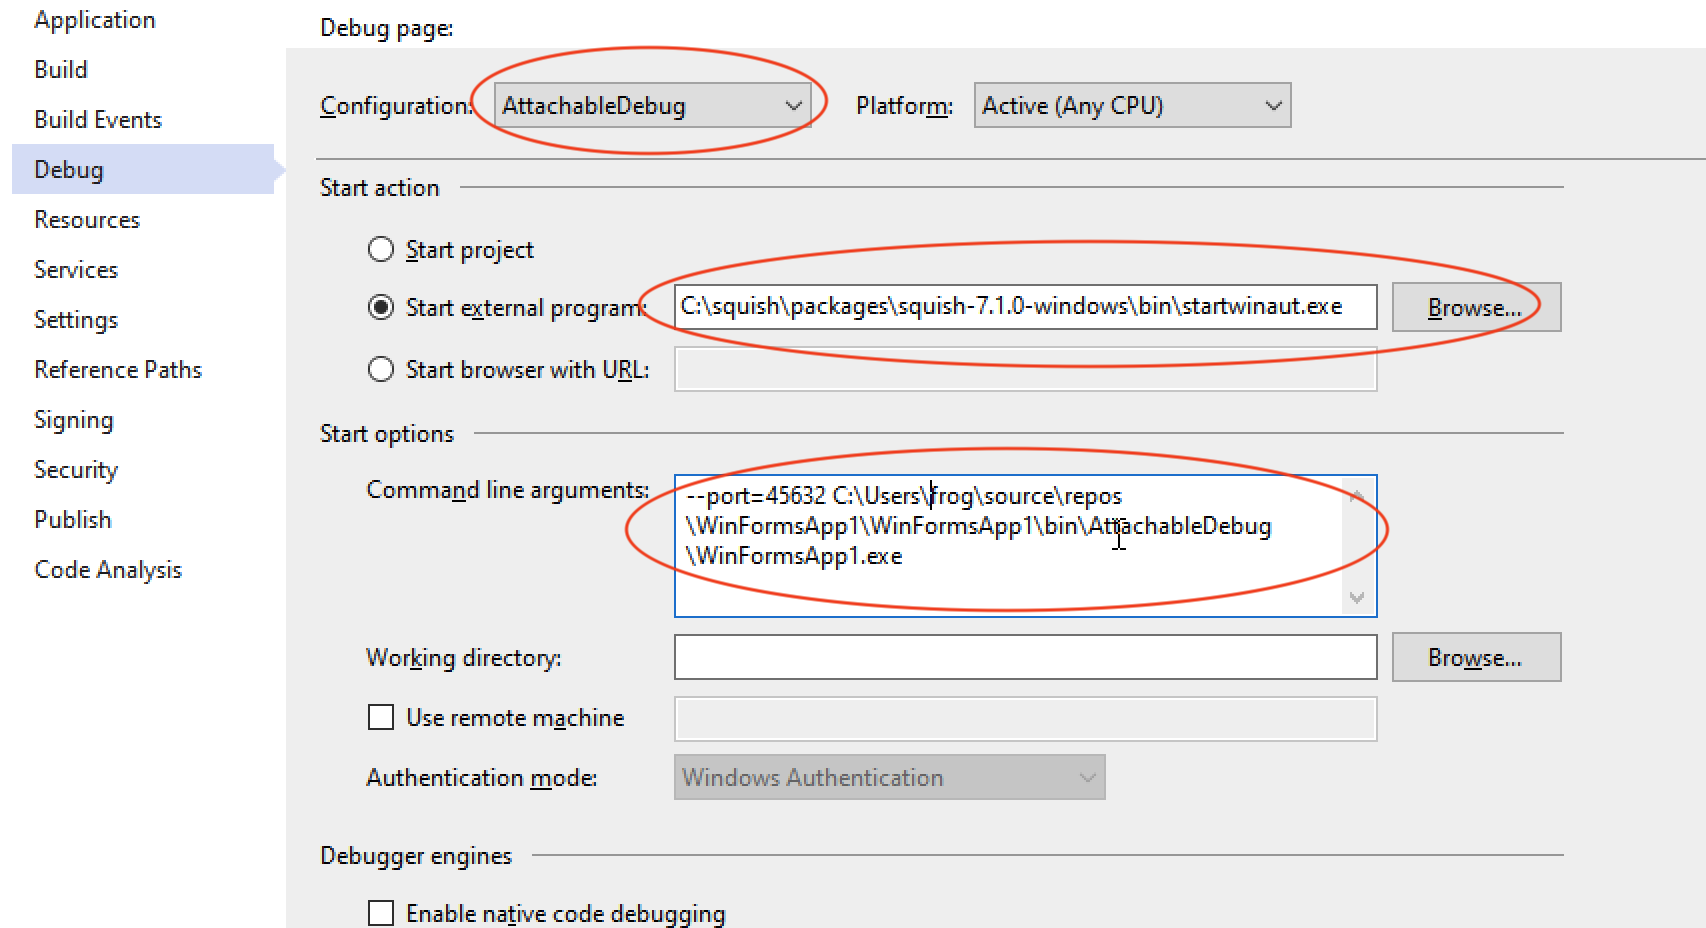
Now open the project properties (Project→<Appname> Properties...) and switch to the Debug page. There you should see a Start Action menu as well as Start Options. These need to be set up almost just like above:
- Start External Program: Choose the "startaut.exe" (Qt applications) or "startwinaut.exe" (non-Qt Windows applications) executable from $SQUISH_PREFIX/bin. This little helper hooks your application and opens a port for the remote control connection to Squish.
- Command Line Arguments: These are the arguments that need to be passed to startwinaut. Set it to "--port=45632 C:\path\to\your\application.exe" -- where the port is the one you chose when registering the AUT! (Apparently there's no built-in way to use a variable here, so you'll have to put the literal path to the executable in.)
Xcode 13
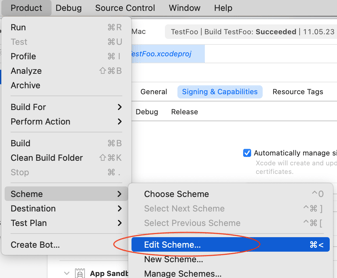
The setup in Xcode is again very similar to the previous ones. You may want to create a new dedicated Scheme for Squish however in this example we will edit the standard scheme to keep things simple. Open the "Product" menu, go to the "Scheme" menu and from there select "Edit Scheme".
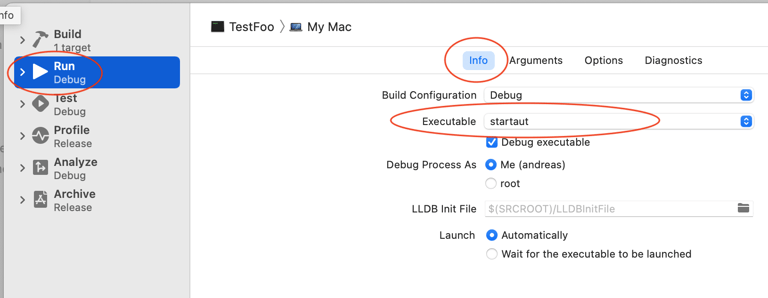
In the scheme editor select the "Run" tab on the left side and open the dropdown for the Executable, select "Other...". In the opened file dialog navigate to the Squish installation and select the "startaut" executable from $SQUISH_PREFIX/bin. This little helper hooks your application and opens a port for the remote control connection to Squish.
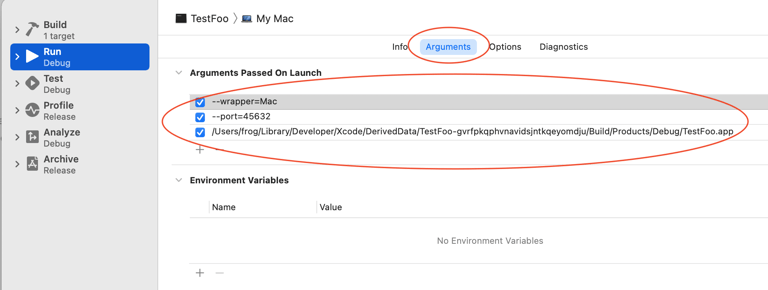
The "startaut" helper needs to know where the application is that is to be started. Go to the "Arguments" tab and fill in the arguments "--wrapper=Mac", "--port=45632" and as shown below. The port is the one you chose when registering the AUT!
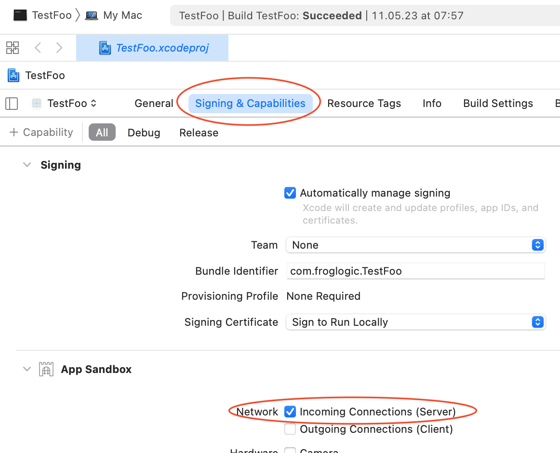
Note: Please make sure that your application has the "Incoming Connections (Server)" option enabled in its App Sandbox settings under "Signing & Capabilities". Squish requires this setting to be able to open the listening port on which you will attach the test script.
Almost Done
Now launch your AUT via the IDE. After it has started up, you can run your test scripts as usual - the only difference is that you need to replace calls to startApplication with attachToApplication. That's it!