Usually when Squish adds an object to the Object Map, Symbolic Name is created as a combination of its properties (e.g. caption and type of the selected object).
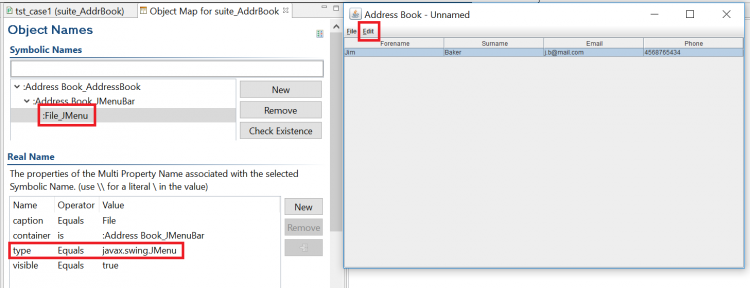
Thanks to that, most of the time it's easy to identify objects behind these names. However, there are cases where it is not enough.
We would like to show you a different approach of defining your own Symbolic Names, even before you start to write your first functional test case.
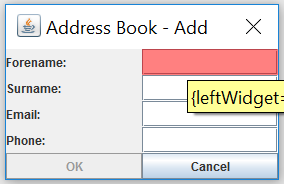
On the image below you can see an "Address Book - Add" dialog from our example application - Addressbook.
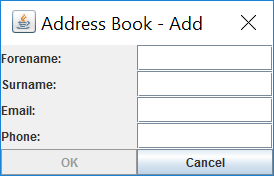
Here is a list of Symbolic Names of objects located in this dialog.
[code language="plain"]:Address Book - Add.Cancel_JButton
:Address Book - Add.Email:_JLabel
:Address Book - Add.Email:_JTextField
:Address Book - Add.Forename:_JLabel
:Address Book - Add.Forename:_JTextField
:Address Book - Add.OK_JButton
:Address Book - Add.Phone:_JLabel
:Address Book - Add.Phone:_JTextField
:Address Book - Add.Surname:_JLabel
:Address Book - Add.Surname:_JTextField[/code]
All of them were created automatically by Squish and they are precise and self explanatory. Unfortunately if you want to use any of them in your test case it might be problematic to remember these long names. Of course you can change all of them manually in the Object Map and make them simpler. It might take some time to locate them in the Object Map and clarify if they correspond to the object we think of.
Instead of that we can define our own Symbolic Names with a little help of the waitForObject() function and the "Object Not Found" dialog.
- Create a new test suite for the AddressBook application.
- Ensure that Object Map for this suite is empty.
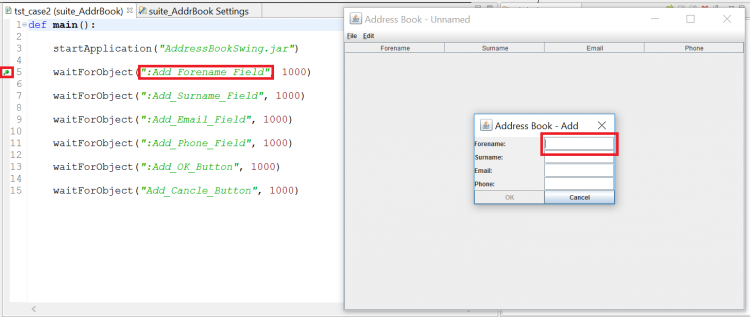
- Create a new new test case that starts your application.
[code language="python"]def main():
startApplication("AddressBookSwing.jar")
[/code]
- Add waitForObject() call for each object you are interested in.
Define your own Symbolic Names.
Set timeout parameter for 1000ms to save some time during next steps. - Add a breakpoint at the first line with waitForObject() call.
- Save and replay your test case.
- When the breakpoint is reached, go to the Addressbook and open the "Address Book - Add" dialog (Menu→File→New..., Menu→Edit→Add...)
- Resume test case execution.
After a moment "Object Not Found" dialog for the first defined Symbolic Name will pop out.
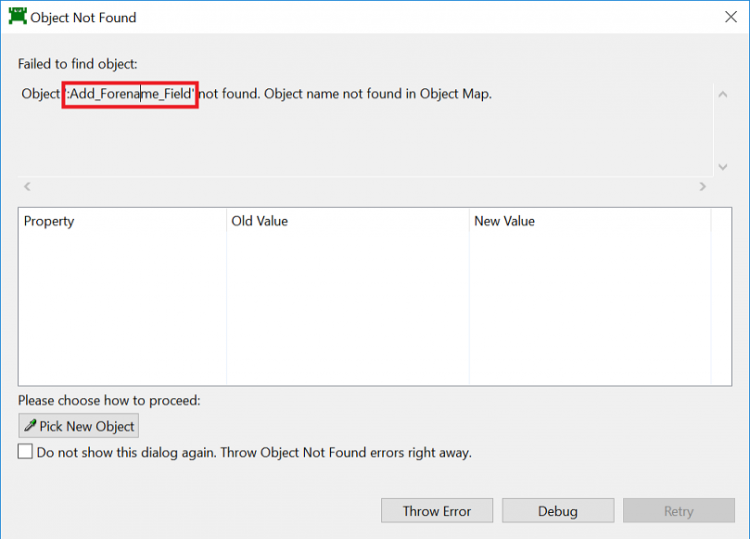 As you can see, there is no information about any property of ":Add_Forename_Field". It's totally fine as a Forename field was not added to the Object Map yet.
 - Click on a "Pick New Object" button.
Now with a pick tool you are able to select the object you are interested in. In our case it will be a Forename text field.
Standard set of object properties will be selected and wrote into the "Object Not Found" dialog.
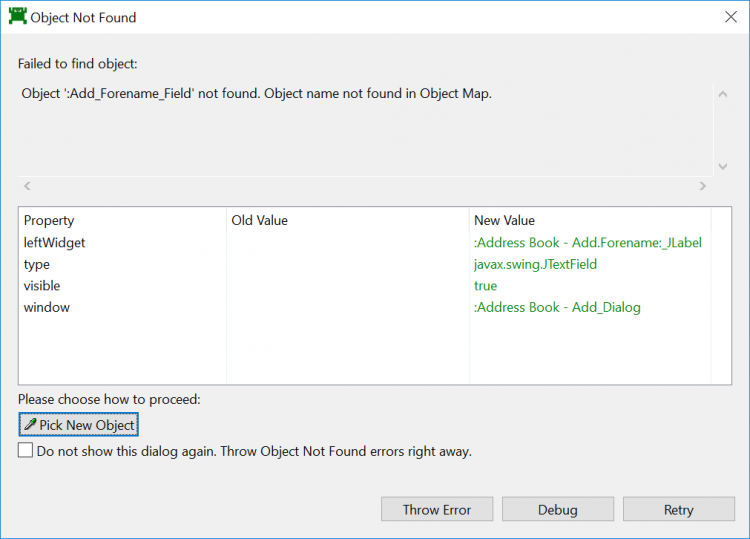
- Click on the Retry button
This action will add picked object to the Object Map under the ":Add_Forename_Field" Symbolic Name.
After this step "Object Not Found" dialog will pop up again but this time for the Surname filed, so you can just repeat steps 8-10 for this and next objects.
When you finish above steps all selected objects will be saved under defined symbolic names. Moreover every time you record a test case in the test suite using this particular ObjectMap, those names will be reused.