Some applications display diagrams or pictures and it's desirable to verify that such images are shown correctly. Squish offers screenshot verifications, which can be configured to use different comparison algorithms to decide if the actual image is as expected or not. We will look at the advantanges and disadvantages of each algorithm and also discuss the use of image masks as a way to focus the comparison on the relevant portions of the image.
Different Algorithms, Different Purposes
Strict Comparison
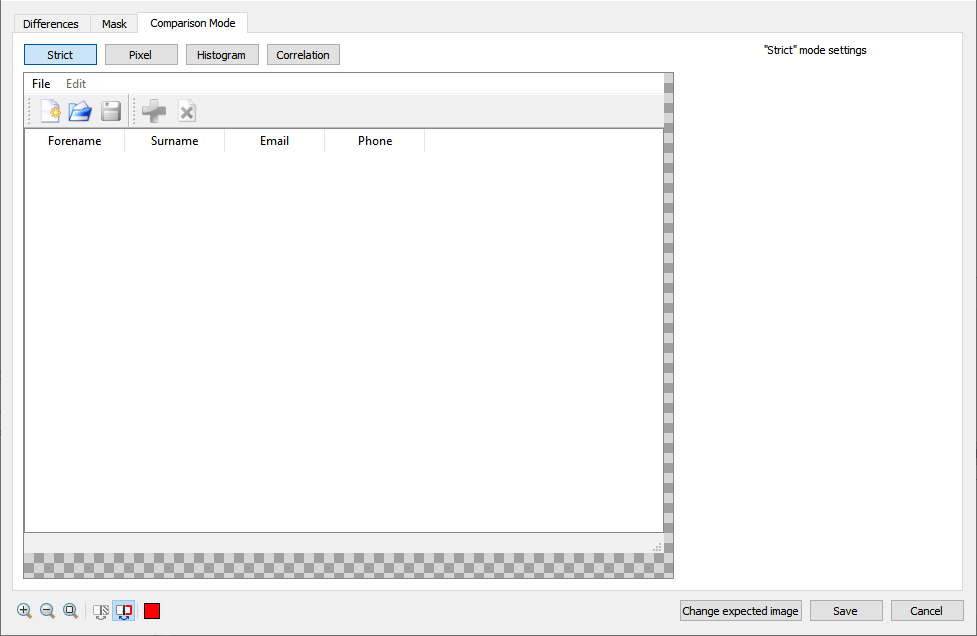
This algorithm compares the screenshot taken during test to the baseline one, assuming they have the same dimensions, and compares the two images pixel by pixel. This mode is sensitive to a lot of factors (operating system, GPU and drivers, …) and works best when testing is done on the exact same machine with the exact same configuration.
Pros:
- Ensure exact matches between expected and taken screenshots.
- Can therefore check for exact same layout, colors, font, size etc, all at once!
Cons:
- Very sensitive to any changes in the setup (font, color, size,…)
Fuzzy Pixel Comparison
The fuzzy pixel comparison is like the strict one except that it allows a certain percentage of the screenshots to be different, still assuming same dimensions. This is to account for situations where testing is done on a machine susceptible to change (graphic card drivers or operating system updates, for example).
Pros:
- Allows balancing resilience to changes in testing setup and "strictness".
- Same as strict as it allows ensuring same layout and all but with some leniency!
Cons:
- Requires careful tuning to avoid being too tolerant. For example, allowing 100% difference would mean that the verification would pass regardless of what the actual images shows!
Histogram Comparison
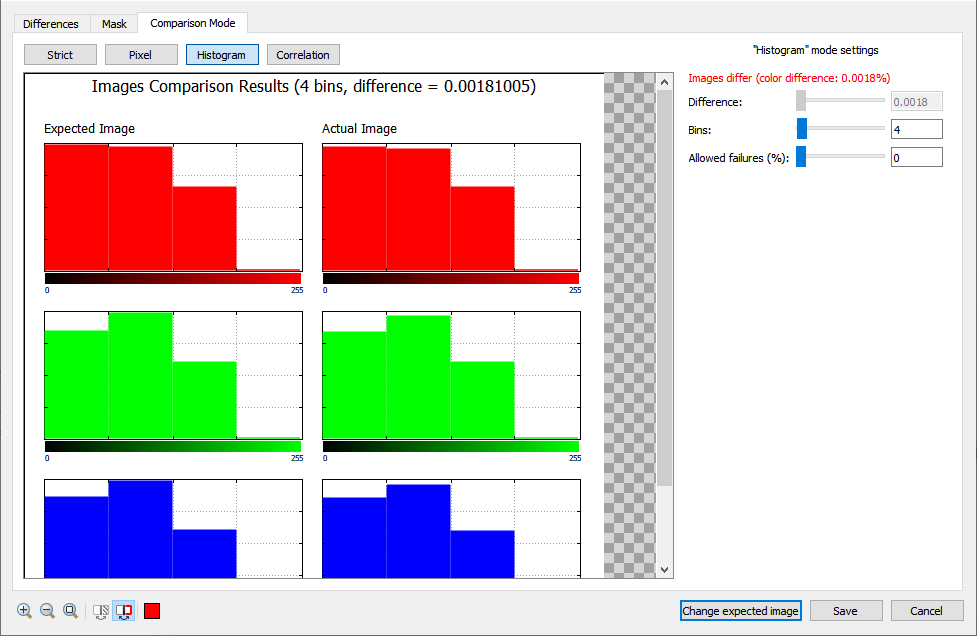
The histogram comparison aims to compare color profiles, also allowing a certain amount of differences. The idea is to check if both the baseline and test screenshot have the same number of pixels with the same color relative to their dimensions. This means that this mode allows comparison between two images of different dimensions like it would happen when testing with different resolution for example.
Pros:
- Works as expected even if the screen resolution changes or if the orientation of the image changes.
Cons:
- Requires careful tuning of parameters.
- Cannot be use to test for "layout" of the content of the screenshot!
Correlation Comparison
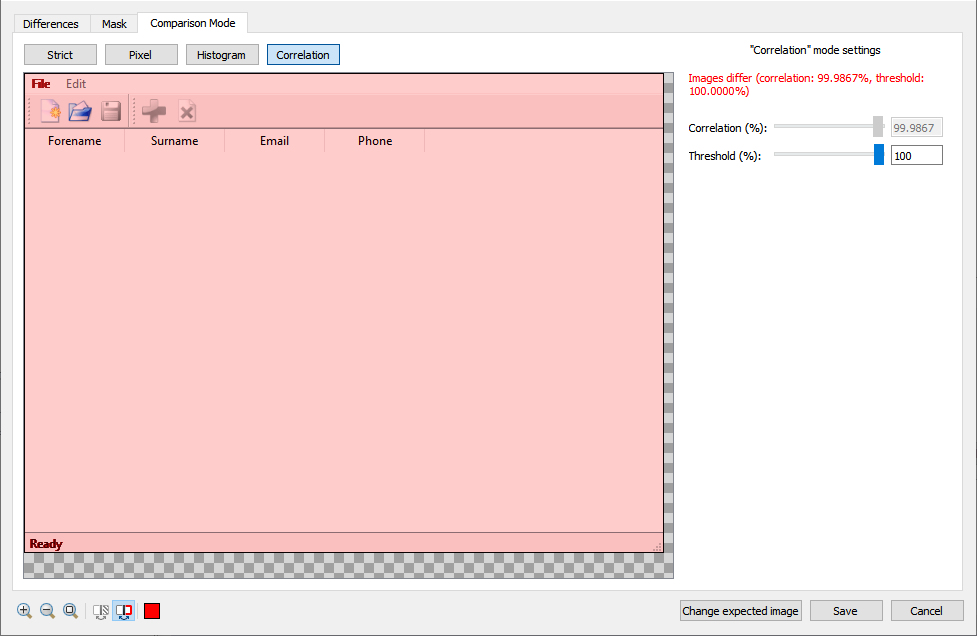
This comparison mode aims to give an indication on how similar the baseline and test screenshot are. This makes this mode a good candidate for mutli-platform testing, in which case many relevant properties such as color values or resolution can be different but still similar enough to consider the image comparison to succeed.
Pros:
- Very flexible, allows handling slight differences in color
- Can handle images with different dimensions (e.g. due to changing screen resolutions)
Cons:
- Is only a "similarity" test, so it might allow more difference than expected if tuned incorrectly.
Screenshot verifications can be configured even further by applying image masks which include (or exclude) certain regions of the image when performing the comparison.
Image Masks
One common motivation for using image masks is best explained with an example. Consider a screenshot verification done on a GUI control which displays a 3D scene. The scene shows a simple blue ball and, in the corner of the GUI control, some information about the position of the ball (say, the X,Y,Z coordinates) and maybe the angle at which the camera views the ball. When checking that the scene shows the right thing, it's often desirable to just verify the rendering of the ball and exclude the text shown. This avoids that e.g. a slight change to the system fonts breaks the image verification.
To solve this, we can define a 'mask' on the image. The mask defines which parts of the image to compare -- or to ignore. Thanks to this, the verification can be focused on the relevant parts of the image.
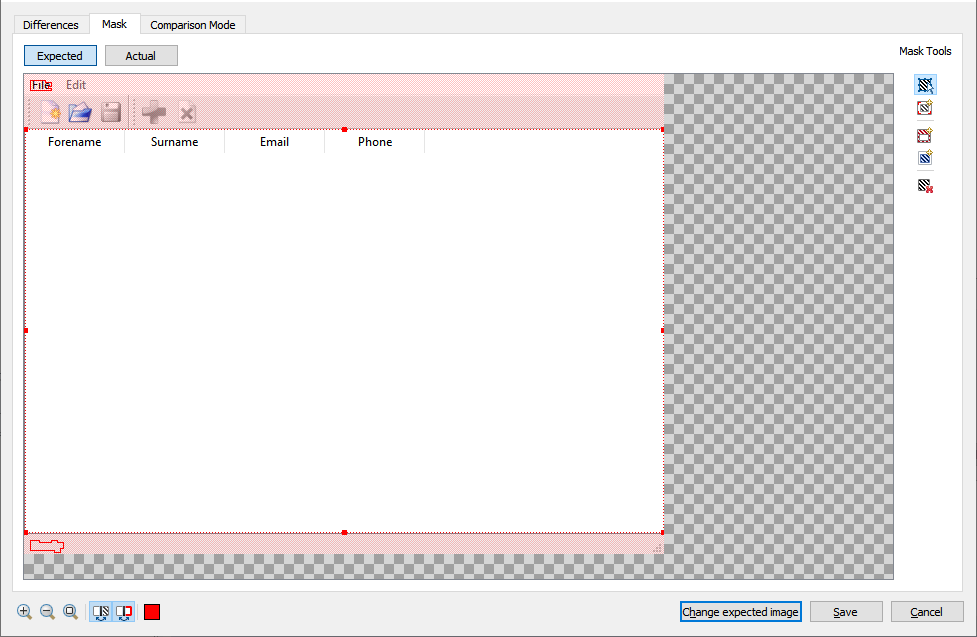
Here's an example of using a positive mask to test just the table control of a simple Addressbook application - the red areas denote the regions which are not included in the screenshot verification:
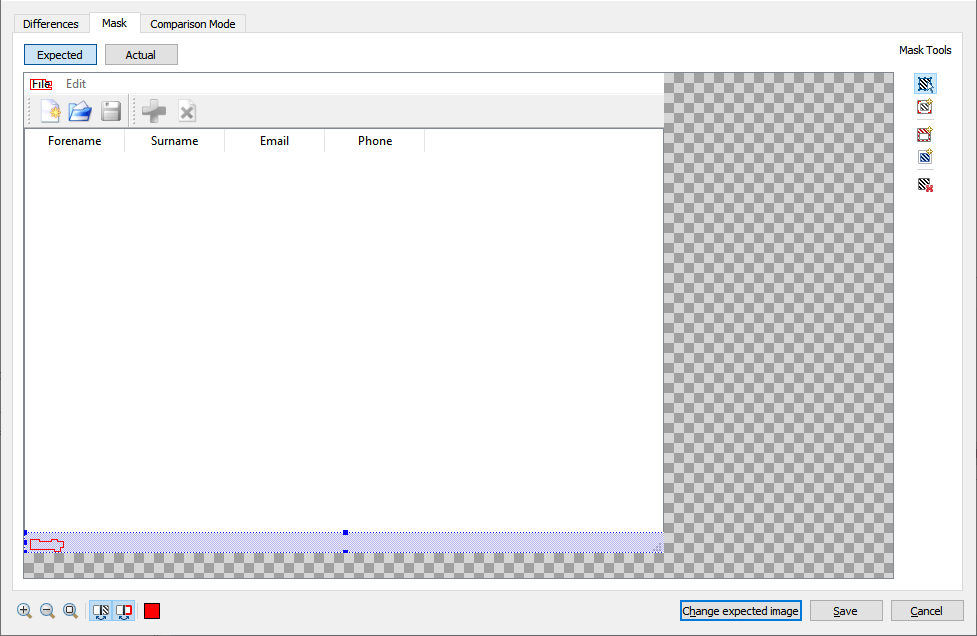
A negative mask is similar: here's an example showing how a negative mask is used to exclude the status bar control at the bottom of the Addressbook window:
You can learn more by reading up on this in the Squish manual, in particular the section about setting screenshot verification masks.
Further Reading
We only scratched the surface -- to learn more about how to create and configure robust screenshot verifications using Squish, please refer to the Squish manual chapter How To Do Screenshot Verifications.